 Nope. Not this one.
 Or this one.
 This one. Like most useful tools, I "borrowed" it from my parents.
I firmly believe that the Bread Machine is the culmination of thousands of years of developing an easier way to mass-produce as many complex carbohydrates as possible. When you think about it that way, it's an integral part of your human heritage to own one of these. As if you needed any more convincing, take heart in knowing that when the Zombie Apocalypse happens (we all know it's just a matter of time) and the supermarkets are closed due to the hordes of ravenous undead surrounding the ragtag gang of survivors holed up inside, you, sir or madam, will not starve. At least until the bag of flour runs out.
There are many different types of bread machines, but they all work in basically the same way. You put the ingredients in; choose a setting (typically based on how dark you want the bread to be); and watch as the machine mixes, kneads, rises, and bakes your bread. There is literally no labor involved. You throw the ingredients in, walk away, and come back when the delicious smell of fresh bread has permeated the closet where you've been playing WOW for 4 hours.
Since I know most of you don't have a bread machine, the recipe I'm using is easily converted to oven-bread. It just takes a bit more effort. Challah bread is a traditional Jewish white bread. It's pretty great. It's also probably the easiest in The Bread Machine Cookbook to make, which is at least part of the reason it's such a favorite. You just hit it and quit it. Yeah, I could pay attention to it all afternoon and add fruit and nuts and stuff 20 minutes into the knead cycle, then add milk and vanilla 50 minutes later...or I can throw everything in at once and go to Barton Springs and compensate with peanut butter and honey later. Really, it's like being friends with benefits with bread.
Challah
(pronounced hallah, or, if you're a little hood, HOLL-A!)
Materials:
Bread Machine
Measuring cups
Ingredients: (medium loaf)
1 cup water
2 eggs
2 tbs vegetable oil
2 tbs sugar
1 1/2 tsp salt
3 cups bread flour
1 1/2 tsp yeast
Process (Bread Machine):
1. Add the ingredients to the bread machine pan in exactly the order they are listed. All of the wet ingredients go first, followed by the dry ingredients except for the yeast. This is because you want the yeast to hit the liquid last.
 Halfway done already. Time for a beer to celebrate.
2. After you've added the dry ingredients, dig a small hole in the flour with your knuckle. Put the yeast in the hole. Don't try to solve this one with probiotic yogurt.
3. For this recipe, use the "regular" setting on the bread machine. After you start the bread machine, it will begin making a whirring sound as it mixes the dough, followed by a rather shocking thumping noise, and finally silence as the bread is baking.

The silence of the loaves? No, you're right. Super lame.
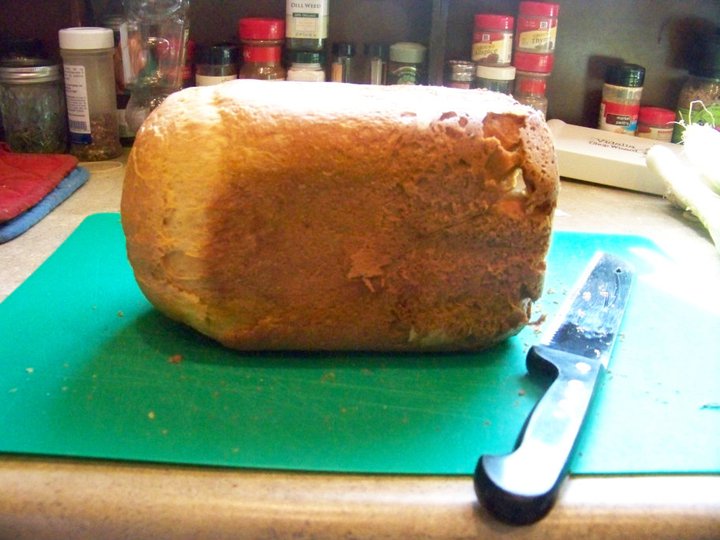
4. After the bread is finished, allow to cool slightly before tipping the bread pan upside down and extracting the bread. Congratulations! You've just made bread with practically no effort whatsoever! Your great-grandmother would shank you out of jealousy if she were here to see this.
Process (oven-met hod):
hod):
1. Mix ingredients in bowl.
2. Knead.
3. Divide dough into 3 sections, roll them into strands and braid them.
4. Cover and allow to rise for 40 minutes.
5. Brush top with a beaten egg and sprinkle with poppy seeds.
6. Bake at 375F for 45 minutes.
Pro tip: You can buy bread machines at places like Goodwill and thrift stores for super cheap.
Effort Rating (On a Scale of 1 to Fuck This!):
Bread Machine- 2
Oven Method- 4
Cost Comparison:
Fresh Loaf from Local Bakery: $4.50
Homemade Challah Bread: $0.85
There are many different types of bread machines, but they all work in basically the same way. You put the ingredients in; choose a setting (typically based on how dark you want the bread to be); and watch as the machine mixes, kneads, rises, and bakes your bread. There is literally no labor involved. You throw the ingredients in, walk away, and come back when the delicious smell of fresh bread has permeated the closet where you've been playing WOW for 4 hours.
Since I know most of you don't have a bread machine, the recipe I'm using is easily converted to oven-bread. It just takes a bit more effort. Challah bread is a traditional Jewish white bread. It's pretty great. It's also probably the easiest in The Bread Machine Cookbook to make, which is at least part of the reason it's such a favorite. You just hit it and quit it. Yeah, I could pay attention to it all afternoon and add fruit and nuts and stuff 20 minutes into the knead cycle, then add milk and vanilla 50 minutes later...or I can throw everything in at once and go to Barton Springs and compensate with peanut butter and honey later. Really, it's like being friends with benefits with bread.
Challah
(pronounced hallah, or, if you're a little hood, HOLL-A!)
Materials:
Bread Machine
Measuring cups
Ingredients: (medium loaf)
1 cup water
2 eggs
2 tbs vegetable oil
2 tbs sugar
1 1/2 tsp salt
3 cups bread flour
1 1/2 tsp yeast
Process (Bread Machine):
1. Add the ingredients to the bread machine pan in exactly the order they are listed. All of the wet ingredients go first, followed by the dry ingredients except for the yeast. This is because you want the yeast to hit the liquid last.
 Halfway done already. Time for a beer to celebrate.
2. After you've added the dry ingredients, dig a small hole in the flour with your knuckle. Put the yeast in the hole.
 Don't try to solve this one with probiotic yogurt.
3. For this recipe, use the "regular" setting on the bread machine. After you start the bread machine, it will begin making a whirring sound as it mixes the dough, followed by a rather shocking thumping noise, and finally silence as the bread is baking.

The silence of the loaves? No, you're right. Super lame.
4. After the bread is finished, allow to cool slightly before tipping the bread pan upside down and extracting the bread. Congratulations! You've just made bread with practically no effort whatsoever! Your great-grandmother would shank you out of jealousy if she were here to see this.
Process (oven-met
 hod):
hod):1. Mix ingredients in bowl.
2. Knead.
3. Divide dough into 3 sections, roll them into strands and braid them.
4. Cover and allow to rise for 40 minutes.
5. Brush top with a beaten egg and sprinkle with poppy seeds.
6. Bake at 375F for 45 minutes.
Pro tip: You can buy bread machines at places like Goodwill and thrift stores for super cheap.
Effort Rating (On a Scale of 1 to Fuck This!):
Bread Machine- 2
Oven Method- 4
Cost Comparison:
Fresh Loaf from Local Bakery: $4.50
Homemade Challah Bread: $0.85
Weird, I know, but I saw your eggs realized they were store bought and wanted to give you fresh eggs from the chickens that are currently shitting on my porch. If you ever want fresh eggs, let me know, we usually charge about $3 a dozen, but I can get you your first dozen free!
ReplyDeleteActually, these were duck eggs from a farm down the road, but I would love to buy chicken eggs from you!
ReplyDeleteso cool! can't wait for the next post!
ReplyDeleteLove,
Your Avid Reader